
Homemade Shrunken Head Apple Cider
Is it really Fall if you don’t have at least one mug of hot apple cider? Since I was a child, I have been obsessed with cider and demanded that all holiday gatherings have a crockpot full of it, ready for me to drink. The murkier, the better! We’d typically make it with prepackaged mulling spices, but I started taking the lazier route as I got older and would buy pre-made cider from the grocery store. Until this blog post, I had never even considered making it from scratch! I’m so glad I gave it a try. Not only does it taste great, but it makes your house smell incredible as well!
I wanted to spook things up a bit, so I made some shrunken heads to use as a PERFECT garnish! Since shrunken human heads aren’t readily available (Ina Garten probably bought them all), apples are the next-best option. I think these heads would be fantastic for a Halloween party and to make with kids! I know my niece would have a blast making these with me! Keep reading to find out how to make your own!
Homemade Hot Apple Cider
Who knew cider was so simple to make cider? I found a recipe on delish.com, and all you need are apples, an orange, brown sugar, whole allspice, whole nutmeg, whole cloves, and cinnamon sticks. It has just the right flavor and level of murkiness I wanted, and it was SOO good! There are all sorts of recipes available online that use various other ingredients, but the one I used worked great!
In the photos below, I used a saucepot…I DO NOT recommend you do the same. You’ll need way more water and space, so a large dutch oven or stockpot is best. I was able to get about five cups of cider out of it, but it threatened to overflow and I only used six apples instead of the ten called for in the recipe. You could also use a crockpot, but I think it would take a lot longer than two hours to get the apples tender enough to mash.
Recipe: delish.com


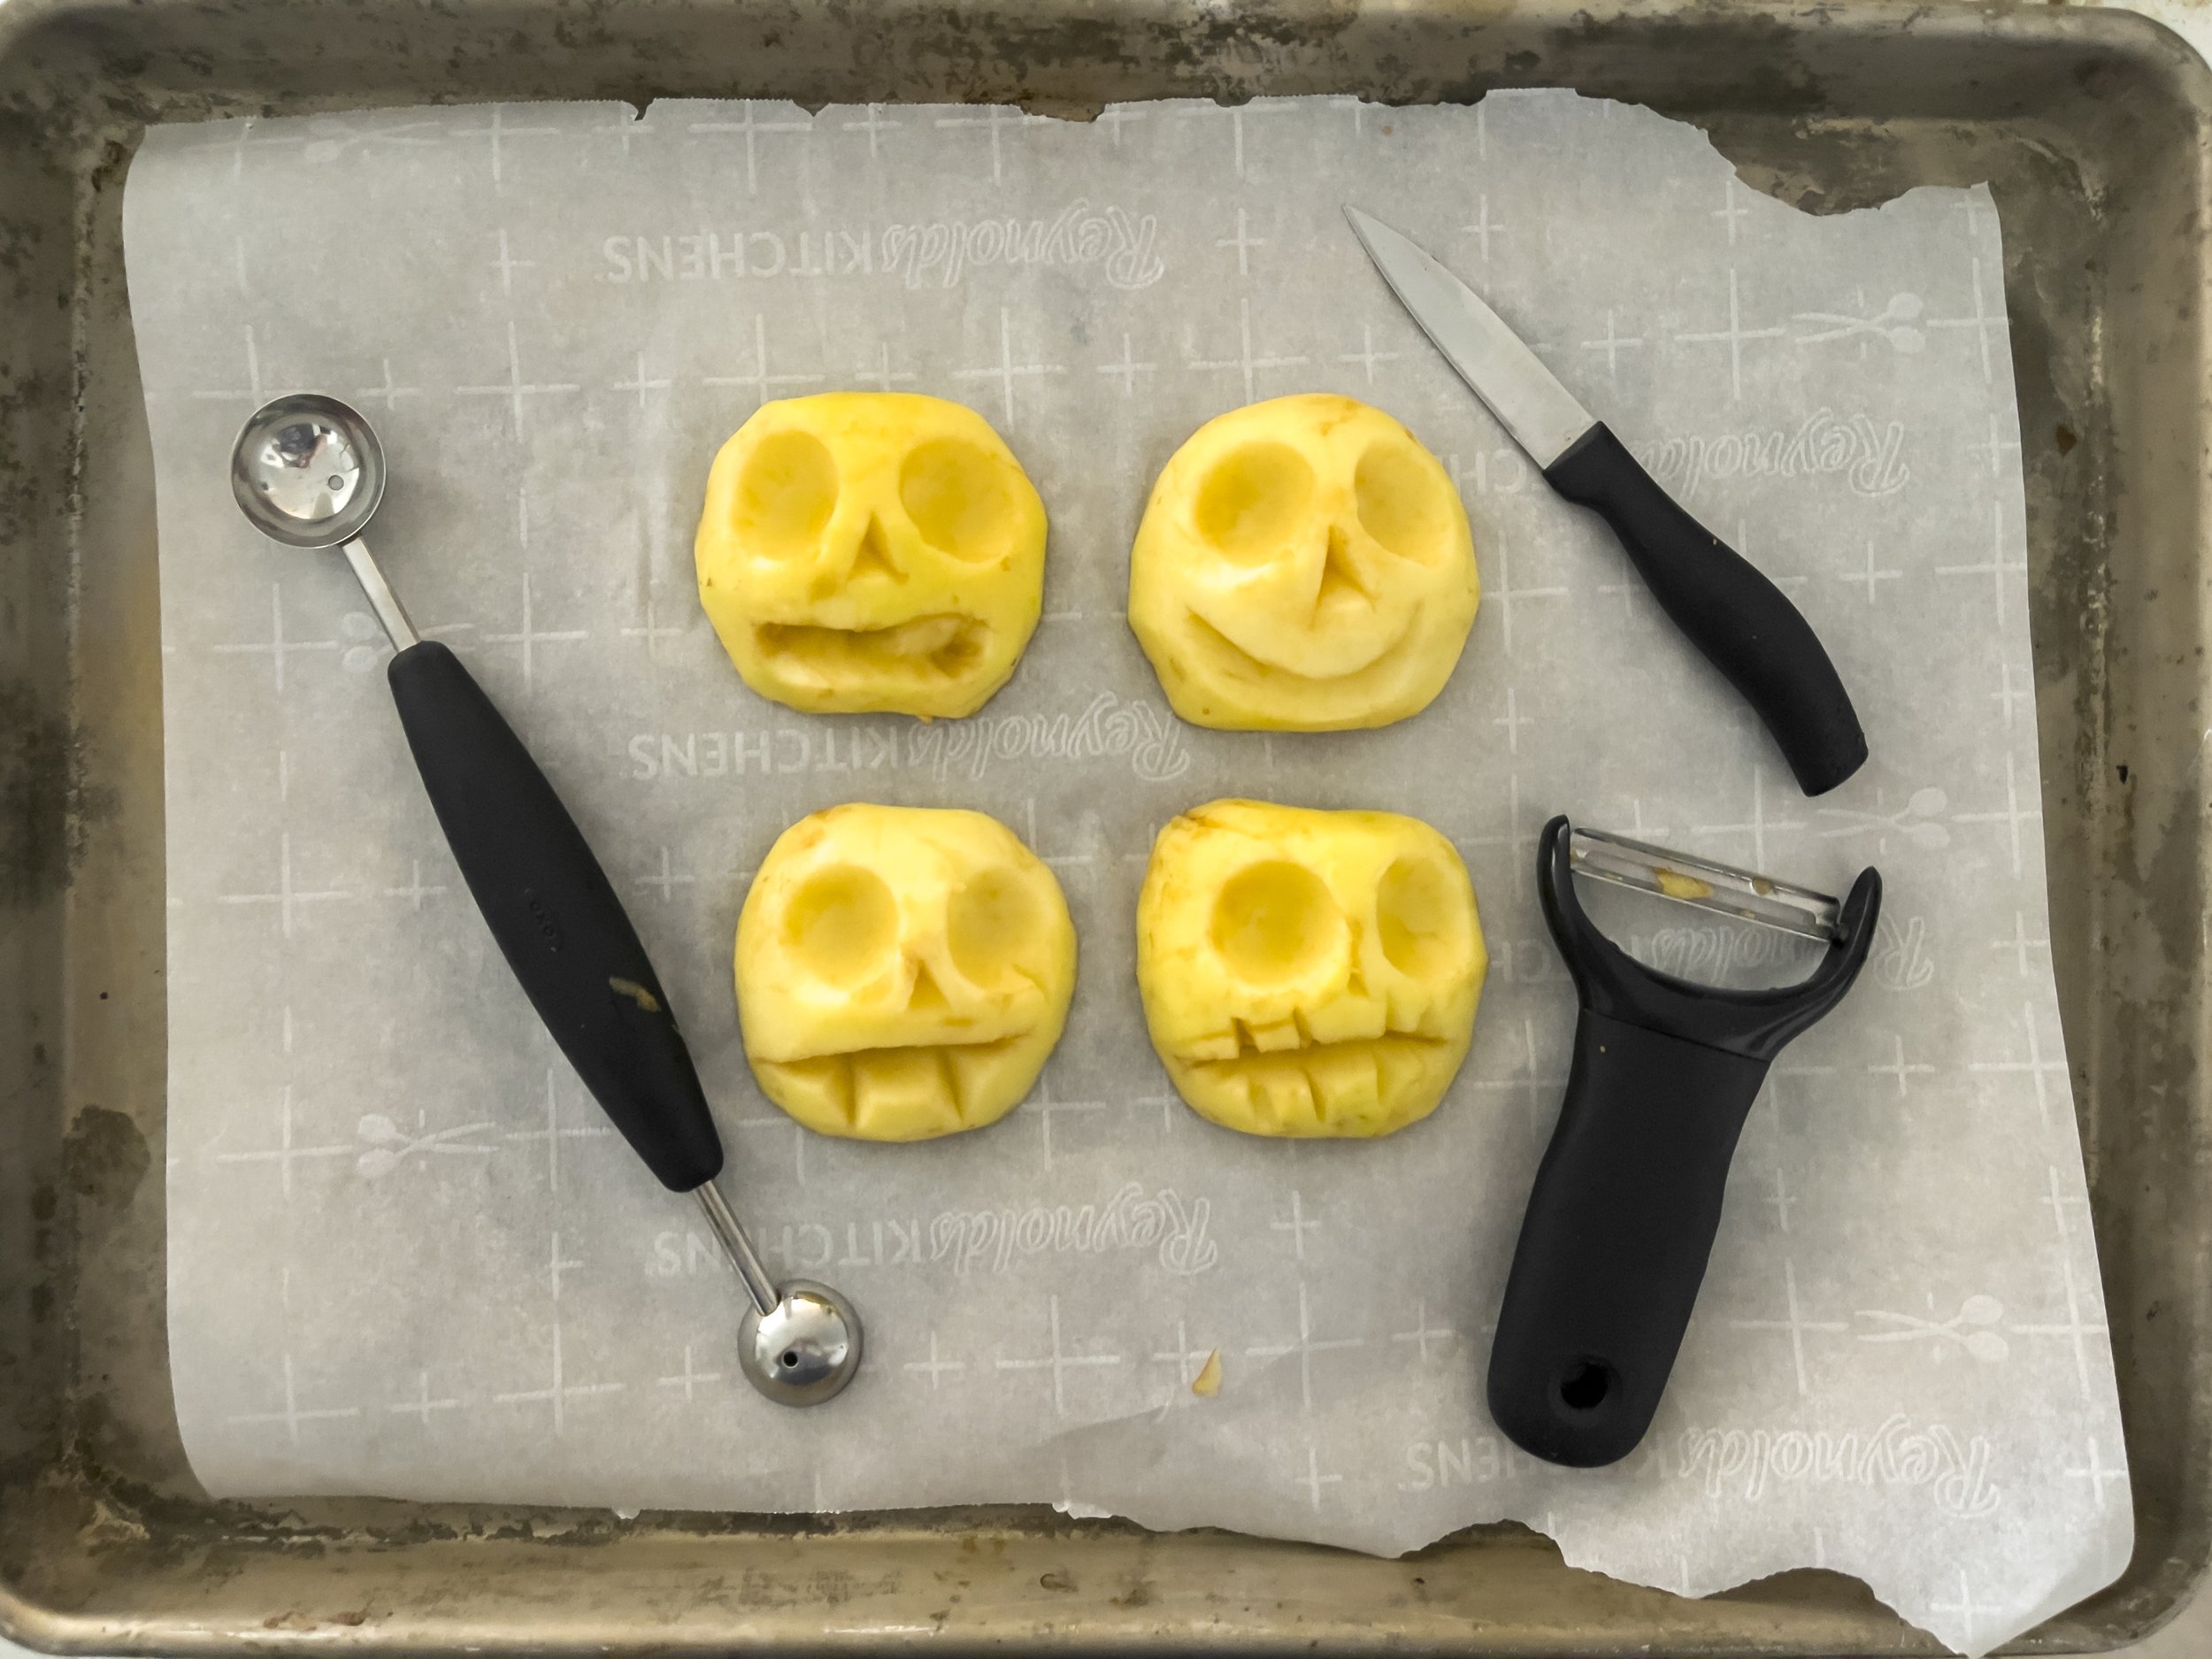
shrunken apple heads
Here is the fun part - making the heads! I made FOUR different batches of heads with three different types of apples. I saw several different techniques online, and I wanted to try them all out and see which were best. Some people left the apple whole and raw (not dehydrated), but I felt that only worked for punch bowls, and the face wouldn’t always stay facing up. Others kept the apple stem on, which I think looks way cooler, but it made it harder to get all the core out. I wanted the apples to be completely edible, so I did without the stem. Slicing them in half away from the core was much easier, and I used the leftover apple bits to treat my pups. FYI - apples are fine for most dogs, but the seeds ARE NOT.
I used Gala Apples in my first batch because they were smaller, cheaper, and I thought they’d fit into a mug easier. However, once they were dehydrated for three hours, they were a little too small and lost a lot of the details from the carvings. If you choose a smaller apple, don’t bake them for the full three hours. Check on them after one hour and take them out before they get too “wrinkly.”
My best results came from larger Honeycrisp Apples, which are in the photos below. Once dehydrated, they shrunk enough to fit into a mug without losing all the facial details! They cost more than many of the other apples (at least they do here in Texas), but they definitely looked the best and floated the best.
Tools Needed (with links):
DISCLOSURE: SOME OF THE LINKS POSTED ARE AMAZON AFFILIATE LINKS, MEANING, AT NO ADDITIONAL COST TO YOU, I WILL EARN A COMMISSION IF YOU CLICK THROUGH AND MAKE A PURCHASE.


directions:
Pre-heat oven to 250 degrees F.
Peel the skins off the apples.
Slice the apples in half, slightly off-center to stay away from the core, and remove any leftover seeds/core with peeler or melon baller.
Using a melon baller, make the eyes.
Using a paring knife, cut a nose and any mouth expressions that you’d like!
Place apple faces on a parchment-lined baking sheet and pop in the oven.
Bake for three-ish hours. You’ll see them starting to dehydrate after an hour, but I liked how they looked after three. After the first hour or two, check on them every 30-minutes to make sure they don’t shrivel up too much.
Pop your shrunken apple heads into your drink or punch bowl, and enjoy the coolest/spookiest cider garnish!
Note: If you don’t use them immediately, they will continue to shrivel up as mine have. I had mine in the fridge for a few days before I took the photos. I didn’t mind it, but I did want to warn you in case you do the same.


add a little bit of…spice
And by spice, I mean whiskey. I wasn’t kidding when I said I was obsessed - I already have two other apple cider blog posts! While today’s recipe is kid-friendly, my other two are not (21+ only). One is for a hot spiked cider and the other is for a cold whiskey mule. Both are delicious! Use the cider recipe on this blog post and then head on over to either of the other blogs below to zhuzh them up a bit!

